Habanero's Basic Astrophotography Tutorial Part I: Choosing Your Equipment
(to be published as a textfile/article whenever we get a system running. Part of an ongoing series. Split into 2 posts)
So you want to get started in astrophotography. If you are like most people I would be willing to bet that you want to get your feet wet first; see if it's something you enjoy doing. I don't blame you, astrophotography is an expensive hobby and it is worthwhile to see if it is something you will even enjoy before dropping a few hundred to a few thousand bucks on equipment.
I don't want to scare you or anything, but the learning curve of astrophotography is a steep one and in this game it is best to take baby steps and not get too far ahead of yourself, or else you'll end up confused and frustrated.
There are three main breeds of astrophotography out there:
1. Digiscoping/Afocal - also known as holding the camera up to the eyepiece. Good for the Moon, but passable results can be had with planets as well. This is a good beginning spot.
2. Webcam/High FPS Camera - for planetary imaging. You can get started by gutting an old webcam and get good results on the Moon, or purchase imagers made by Celestron that are more sensitive than your run-of-the-mill webcam and can handle the planets. Alternatively, there are several high-frame rate cameras out there that are very sensitive and produce excellent results, but will cost several times as much as the first two options. This is also good for beginners, but there are a few more nuances to this than just holding a camera up to the scope. If you're up for a challenge and/or just want to skip afocal photography, give this a shot.
3. Long Exposure - for anything beyond the solar system. Usable cameras range from DSLRs coupled to the telescope at prime focus to thousand-dollar CCD's. Generally the most expensive type of astrophotography due to all the equipment needed. Results vary with light pollution, and getting a good final image can be very tough.
While it is certainly possible to be a "jack of all trades" when it comes to imaging targets (e.g. being both a solar system and a deep-sky imager at once) it is hard to be a master of all. In my experience I have rarely seen a fantastic deep-sky imager who's talent is replicated in solar system imaging, or vice versa. So, I recommend you find a niche and stick with it.
Afocal is the easiest way to get started as I stated earlier, and if you choose the right telescope it is a simple task to graduate to webcam imaging if you decide to get more serious.
So what is the right equipment for you? That's the focus of this thread.
When purchasing a telescope, especially for imaging use, it is prudent to split the system up into two or three components: OTA (optical tube assembly) and mount, or OTA, mount, and camera, depending on how you look at it. It's subjective and doesn't really matter, the point being that you need to pick a type of telescope suitable for the work you are doing, and a mount that can support it. The lower-end of what I list will be complete packages, these are suitable for beginners but as you move forward you will want to advance at least your mount. Fortunately it is not as if the telescope is permanently attached to the mount it comes with!:p
I am going to split up the potential options into two different categories: planetary and long exposure, because they are two entirely different breeds of imaging with nearly polar opposite requisites. Planetary imaging requires very high magnification which yield narrow fields of view, while deep sky calls for lower magnification and wider fields of view.
Digiscoping is flexible - I found that for the moon I got best results using low magnifications, but on planets higher was better. You may hear the phrase "Aperture is king" but this is not always true. While a bigger telescope will generally give crisper more detailed views, the atmosphere is a huge limiting factor. Stability (for high magnification images of the planets) is hard to come by, and transparency (amount of crap in the atmosphere, easily obscures deep-sky objects) can easily ruin a night's imaging, no matter your telescope.
There are different telescope types suitable for each breed of imaging. You have the refractor and reflector, along with catadioptric Schmidt-Cassegrain and Maksutov-Cassegrain designs, at the most basic level. On the higher end are Ritchey-Chrétiens, Dall Kirkhams, etc and are outside the scope of this article.
You may notice that most of these listed products come from manufacturer Orion, rest assured I don't work for them. I just like their products and they fulfill a wide range of imaging needs. As you grow as an astrophotographer, you will expand your horizons to other companies as well. Orion happens to provide a good starting point.
Enough rambling you say, show me where to get started!
The following are good planetary setups. I am arranging them by price.
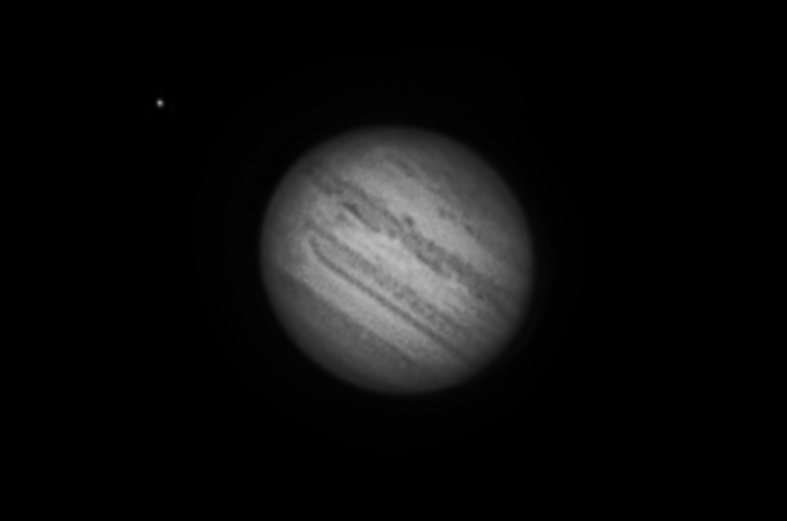
1. Celestron 127 SLT
This telescope is a 127mm (about 5 inches) Maksutov-Cassegrain. MCT's are prized for their optical clarity, and are excellent on planets. If you want to get started with hi-magnification planetary imaging, this is a good candidate. I have used a very similar combination (this particular telescope was not out yet - I combined the SLT mount from a different version of this telescope with a bare 127mm OTA) with excellent results. Here is a sample image taken by me with this setup:
2. Orion SkyView Pro 150mm MCT
You'll notice that this telescope (which is about 6 inches btw) sits on an entirely different breed of mount. This sort of mount is called a German Equatorial Mount or GEM for short. I will explain the difference between GEM's and alt-az mounts (as seen in #1) in a subsequent thread. The long and short of it is though, GEM's are better than alt-az.
3. Orion Sirius GEM + Orion 203mm (8") Reflector *NOTE - If you consider this sort of option you MUST see the accessories page - reflectors have a very fast focal ratio!*
I use a similar setup to #3 here, which has produced some excellent images:
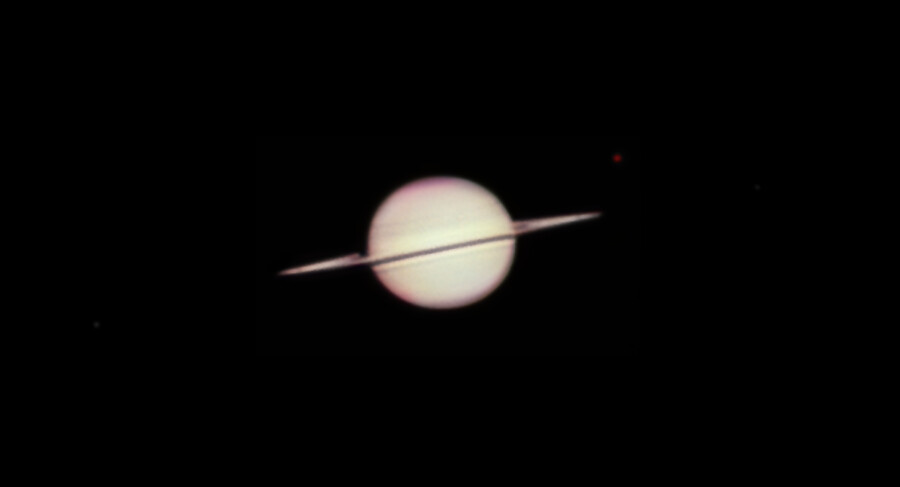 Personally, I am of the view that an 8" telescope is a very good median compromise between aperture and budget. It can produce fantastic images in good conditions and won't break the bank.
4. Orion Atlas GEM + Orion 254mm (10") reflector
This is the highest aperture I will go up to in this article because it is directed towards the beginner who wants to know his options. Of course there are bigger apertures, but I am considering someone who is just starting, and showing them good places to begin and their options once they outgrow whatever they were using.
Next I will cover systems for deep-sky imaging. You will notice that EVERY system in here will be using not only a GEM but a heavy-duty one at that. You can get away with overmounting in planetary because tracking is not as imperative, but in deep sky, the lighter the load on the heavier-duty mount, the better.
1. Orion Sirius GEM + Orion ED80 80mm apochromatic refractor
2. Orion Atlas GEM + Orion 6" Imaging Reflector
*Be careful when using Newtonians to image with. They are notorious for having focus issues with cameras. That said, this is marketed as an imaging Newt so you should not have problems*
3. Orion Atlas GEM + Orion 120mm Apochromatic Refractor
Personally, in my opinion, deep-sky imaging is not for the beginning astrophotographer. There is a lot to master in it, and I have barely even begun to grasp it. (There's a reason why I stick to imaging planets!) I will do my best to explain the basics in other threads, but it is not my area of expertise.
Next I will proceed to cameras. Again I will be splitting these up in between planetary and long exposure.
1. Any basic webcam! If you have an old one lying around, gut it up (making sure that there is nothing in front of the actual camera chip - this is important! No lense, no little clear filter.) Find an old film canister, cut a little hole in the back to stick the camera through, and you have a basic prime focus camera. In general, webcams don't perform well in low light, so expect this to be limited to the Moon, Venus and maybe Jupiter.
2. Celestron NexImage
This is a good all-around starter camera. You can image any solar system object out to about Saturn. The two others, Uranus and Neptune, are too dim for it.
3. The Imaging Source DBK21AU.04
This is similar to the NexImage, except captures uncompressed video at a faster speed and is much more sensitive.
4. The Imaging Source DMK21AU.04 + Orion LRGB filter set + filter wheel
What many advanced planetary imagers use. The mono chip of the DMK means that every pixel receives light - add the filter wheel to create full RGB images.
5. The Imaging Source DMK21AU.04 + The Imaging Source DBK21AU.04 + Flip Mirror
An extremely flexible combo that I myself am going to pursue. The mono cam would be used to shoot luminance, which provides the detail, in combination with an infrared filter, and the color camera would, obviously, provide the color. The flip mirror allows both to be in focus at once and easily be able to toggle between the two. It is advisable that you have two computers to run these, to prevent bottleneck of the video. I like this because I can use the color camera to shoot lunar eclipses, for example, which are so heavily in the red during totality that I would rather avoid the hassle of shooting tri-color.
There are other cameras that are much more sensitive such as the Point Grey Research Flea3, but one of those cameras costs as much as option#5, discounting a filter wheel. That and I have never used them, so I would not be able to write any decent article on them.
Deep Sky Cameras:
1. Meade DSI Pro II
I have the predecessor to this camera and it is a decent little guy once you get the hang of it. I will probably dedicate a thread entirely to it. There -is- a one-shot-color version of this camera, but when imaging deep sky the loss of sensitivity is not worth it at this small chip size.
2. Meade DSI Pro III
The latest generation of camera #1.
Make sure that you have a color filter set on hand already OR that the DSI Pro you are ordering comes with color filters in its filter bar, or else you're going to be stuck with a strictly mono cam...of course you can order color filters later, but you'll spend more money in total.
3. Orion Starshoot Pro V2
You may wonder why I am listing a color camera here when earlier I pointed out their lack of sensitivity...and that is merely because this camera has a GIANT chip, meaning a very wide field of view and tracking error becomes less obvious. To me, that is a decent trade-off.
4. Orion Parsec 8300M
You will need a filter wheel and filters for this guy, but it is a serious camera. However, I recommend that if you reach this level to do some research into other camera companies...SBIG, QHY...etc. You can probably get better for cheaper, or so I have heard.
So you want to get started in astrophotography. If you are like most people I would be willing to bet that you want to get your feet wet first; see if it's something you enjoy doing. I don't blame you, astrophotography is an expensive hobby and it is worthwhile to see if it is something you will even enjoy before dropping a few hundred to a few thousand bucks on equipment.
I don't want to scare you or anything, but the learning curve of astrophotography is a steep one and in this game it is best to take baby steps and not get too far ahead of yourself, or else you'll end up confused and frustrated.
There are three main breeds of astrophotography out there:
1. Digiscoping/Afocal - also known as holding the camera up to the eyepiece. Good for the Moon, but passable results can be had with planets as well. This is a good beginning spot.
2. Webcam/High FPS Camera - for planetary imaging. You can get started by gutting an old webcam and get good results on the Moon, or purchase imagers made by Celestron that are more sensitive than your run-of-the-mill webcam and can handle the planets. Alternatively, there are several high-frame rate cameras out there that are very sensitive and produce excellent results, but will cost several times as much as the first two options. This is also good for beginners, but there are a few more nuances to this than just holding a camera up to the scope. If you're up for a challenge and/or just want to skip afocal photography, give this a shot.
3. Long Exposure - for anything beyond the solar system. Usable cameras range from DSLRs coupled to the telescope at prime focus to thousand-dollar CCD's. Generally the most expensive type of astrophotography due to all the equipment needed. Results vary with light pollution, and getting a good final image can be very tough.
While it is certainly possible to be a "jack of all trades" when it comes to imaging targets (e.g. being both a solar system and a deep-sky imager at once) it is hard to be a master of all. In my experience I have rarely seen a fantastic deep-sky imager who's talent is replicated in solar system imaging, or vice versa. So, I recommend you find a niche and stick with it.
Afocal is the easiest way to get started as I stated earlier, and if you choose the right telescope it is a simple task to graduate to webcam imaging if you decide to get more serious.
So what is the right equipment for you? That's the focus of this thread.
When purchasing a telescope, especially for imaging use, it is prudent to split the system up into two or three components: OTA (optical tube assembly) and mount, or OTA, mount, and camera, depending on how you look at it. It's subjective and doesn't really matter, the point being that you need to pick a type of telescope suitable for the work you are doing, and a mount that can support it. The lower-end of what I list will be complete packages, these are suitable for beginners but as you move forward you will want to advance at least your mount. Fortunately it is not as if the telescope is permanently attached to the mount it comes with!:p
I am going to split up the potential options into two different categories: planetary and long exposure, because they are two entirely different breeds of imaging with nearly polar opposite requisites. Planetary imaging requires very high magnification which yield narrow fields of view, while deep sky calls for lower magnification and wider fields of view.
Digiscoping is flexible - I found that for the moon I got best results using low magnifications, but on planets higher was better. You may hear the phrase "Aperture is king" but this is not always true. While a bigger telescope will generally give crisper more detailed views, the atmosphere is a huge limiting factor. Stability (for high magnification images of the planets) is hard to come by, and transparency (amount of crap in the atmosphere, easily obscures deep-sky objects) can easily ruin a night's imaging, no matter your telescope.
There are different telescope types suitable for each breed of imaging. You have the refractor and reflector, along with catadioptric Schmidt-Cassegrain and Maksutov-Cassegrain designs, at the most basic level. On the higher end are Ritchey-Chrétiens, Dall Kirkhams, etc and are outside the scope of this article.
You may notice that most of these listed products come from manufacturer Orion, rest assured I don't work for them. I just like their products and they fulfill a wide range of imaging needs. As you grow as an astrophotographer, you will expand your horizons to other companies as well. Orion happens to provide a good starting point.
Enough rambling you say, show me where to get started!
The following are good planetary setups. I am arranging them by price.
1. Celestron 127 SLT
This telescope is a 127mm (about 5 inches) Maksutov-Cassegrain. MCT's are prized for their optical clarity, and are excellent on planets. If you want to get started with hi-magnification planetary imaging, this is a good candidate. I have used a very similar combination (this particular telescope was not out yet - I combined the SLT mount from a different version of this telescope with a bare 127mm OTA) with excellent results. Here is a sample image taken by me with this setup:
2. Orion SkyView Pro 150mm MCT
You'll notice that this telescope (which is about 6 inches btw) sits on an entirely different breed of mount. This sort of mount is called a German Equatorial Mount or GEM for short. I will explain the difference between GEM's and alt-az mounts (as seen in #1) in a subsequent thread. The long and short of it is though, GEM's are better than alt-az.
3. Orion Sirius GEM + Orion 203mm (8") Reflector *NOTE - If you consider this sort of option you MUST see the accessories page - reflectors have a very fast focal ratio!*
I use a similar setup to #3 here, which has produced some excellent images:
4. Orion Atlas GEM + Orion 254mm (10") reflector
This is the highest aperture I will go up to in this article because it is directed towards the beginner who wants to know his options. Of course there are bigger apertures, but I am considering someone who is just starting, and showing them good places to begin and their options once they outgrow whatever they were using.
Next I will cover systems for deep-sky imaging. You will notice that EVERY system in here will be using not only a GEM but a heavy-duty one at that. You can get away with overmounting in planetary because tracking is not as imperative, but in deep sky, the lighter the load on the heavier-duty mount, the better.
1. Orion Sirius GEM + Orion ED80 80mm apochromatic refractor
2. Orion Atlas GEM + Orion 6" Imaging Reflector
*Be careful when using Newtonians to image with. They are notorious for having focus issues with cameras. That said, this is marketed as an imaging Newt so you should not have problems*
3. Orion Atlas GEM + Orion 120mm Apochromatic Refractor
Personally, in my opinion, deep-sky imaging is not for the beginning astrophotographer. There is a lot to master in it, and I have barely even begun to grasp it. (There's a reason why I stick to imaging planets!) I will do my best to explain the basics in other threads, but it is not my area of expertise.
Next I will proceed to cameras. Again I will be splitting these up in between planetary and long exposure.
Planetary:
1. Any basic webcam! If you have an old one lying around, gut it up (making sure that there is nothing in front of the actual camera chip - this is important! No lense, no little clear filter.) Find an old film canister, cut a little hole in the back to stick the camera through, and you have a basic prime focus camera. In general, webcams don't perform well in low light, so expect this to be limited to the Moon, Venus and maybe Jupiter.
2. Celestron NexImage
This is a good all-around starter camera. You can image any solar system object out to about Saturn. The two others, Uranus and Neptune, are too dim for it.
3. The Imaging Source DBK21AU.04
This is similar to the NexImage, except captures uncompressed video at a faster speed and is much more sensitive.
4. The Imaging Source DMK21AU.04 + Orion LRGB filter set + filter wheel
What many advanced planetary imagers use. The mono chip of the DMK means that every pixel receives light - add the filter wheel to create full RGB images.
5. The Imaging Source DMK21AU.04 + The Imaging Source DBK21AU.04 + Flip Mirror
An extremely flexible combo that I myself am going to pursue. The mono cam would be used to shoot luminance, which provides the detail, in combination with an infrared filter, and the color camera would, obviously, provide the color. The flip mirror allows both to be in focus at once and easily be able to toggle between the two. It is advisable that you have two computers to run these, to prevent bottleneck of the video. I like this because I can use the color camera to shoot lunar eclipses, for example, which are so heavily in the red during totality that I would rather avoid the hassle of shooting tri-color.
There are other cameras that are much more sensitive such as the Point Grey Research Flea3, but one of those cameras costs as much as option#5, discounting a filter wheel. That and I have never used them, so I would not be able to write any decent article on them.
Deep Sky Cameras:
1. Meade DSI Pro II
I have the predecessor to this camera and it is a decent little guy once you get the hang of it. I will probably dedicate a thread entirely to it. There -is- a one-shot-color version of this camera, but when imaging deep sky the loss of sensitivity is not worth it at this small chip size.
2. Meade DSI Pro III
The latest generation of camera #1.
Make sure that you have a color filter set on hand already OR that the DSI Pro you are ordering comes with color filters in its filter bar, or else you're going to be stuck with a strictly mono cam...of course you can order color filters later, but you'll spend more money in total.
3. Orion Starshoot Pro V2
You may wonder why I am listing a color camera here when earlier I pointed out their lack of sensitivity...and that is merely because this camera has a GIANT chip, meaning a very wide field of view and tracking error becomes less obvious. To me, that is a decent trade-off.
4. Orion Parsec 8300M
You will need a filter wheel and filters for this guy, but it is a serious camera. However, I recommend that if you reach this level to do some research into other camera companies...SBIG, QHY...etc. You can probably get better for cheaper, or so I have heard.
Comments
None of these setups are perfect. You can and should add to them.
For planetary:
The number one accessory in planetary imaging is the Barlow lense, which quickly and easily doubles (or triples) your focal length, ratio, and magnification. Buy a quality Barlow lense from TeleVue - they are renowned for their craft and their products are worth the money.
If you are using a catadioptric, a 2x Barlow is a good place to be. You may want to consider also purchasing a 3x Barlow as well, for those rare nights of excellent seeing.
If you are using a Newtonian, a 3x Barlow is the bare minimum for planetary imaging, but a 5x Powermate, from TeleVue, (which is best described as a "premium Barlow," even if its optics are different) which will put you at a "sweet spot" focal ratio. Newtonians are very fast optically, hence why it is important to have more powerful magnification.
You may also want to consider a flip mirror to help center your camera. It happens all too often that you center a planet at high magnifications only to lose it once you stick the camera in because of the camera's weight not matching that of the eyepiece. With a flip mirror, all you do is flip the mirror down and the target is dead center in the camera.
When it comes to deep-sky, I would actually include the first of these in every setup although it is not necessary to get started with.
This accessory in particular is:
1. A Autoguiding package. This is a complete setup to have the telescope's mount's periodic error corrected by camera, which watches for drift in the stars and electronically tells the mount how to correct for that. An indispensable accessory, but not a crutch for poor mount alignment.
Also,
2. A light pollution reduction filter. Won't help you inner-city dwellers, but if you live in the burbs it will help a lot.
I think that is all in terms of basic equipment choice. I hope this article gave you a good outlook on options when it comes to choosing your hardware in astrophotography, which is markedly different in requisites than those for visual astronomy.
-Habanero
:mad:this took me all day to write...granted I wasn't actually writing it all day...I was doing shit in between..but still
it's about time I tried to contribute something to this site.
I'll add it to the tutorials
Cool, thanks man.
I have a few threads relevant to this I posted and later deleted on Zoklet on my laptop. Once it gets fixed I'll incorporate them somehow...but it's not like they're super important at the moment anyway.
Btw I am going to format this later and reddit it. I miss Hab.